Building your own computer is an incredibly satisfying process, like making a high-tech creation just for you. But for people who have never done it before, seeing a stack of parts can be a little scary. Do not worry, planned building workers! Putting together a PC is more like putting together complicated LEGO blocks than magic. Let's discuss some fundamental concepts that will help you rapidly transition from having little knowledge about building PCs to becoming an expert.
Planning is Most Important: Your Build Plan
Before considering the various types of screwdrivers, it is essential to prioritize planning.
Define Your Needs and Budget
What are you going to use this PC for, mainly? When you play challenging games on your computer, you need different parts than when you work in an office or edit videos. Please create a budget that you can adhere to. Even though high-end parts may appear attractive, it is possible to build excellent machines with a variety of budget options.
Research Your Components
Study is crucial in this situation. Learn about each part's job:
- The CPU (the brain)
- The GPU (the graphics power)
- The RAM (short-term memory)
- The Storage (SSD for speed, HDD for space)
- The Motherboard (the hub)
- The Power Supply Unit (PSU) (the heart)
Check Compatibility
Use online tools like PCPartPicker to check that the components you have picked are compatible with one another. This will save you problems later on! Don't skip this process without serious consideration; a successful build needs a good plan.
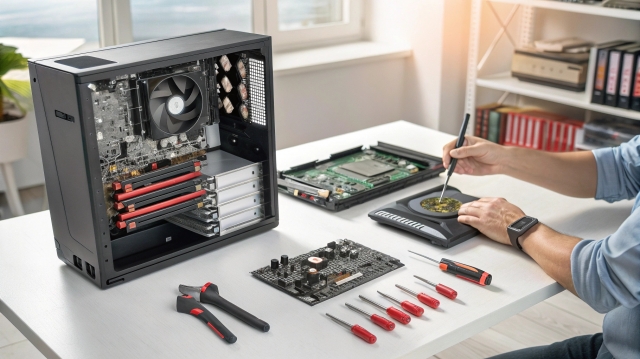
Gather Your Instruments and Prepare the Scene
You don't need a whole mechanic's shop to do this, but having the right tools will make it a lot easier.
Essential Tools:
- A Phillips head screwdriver (preferably magnetic).
- Zip ties or Velcro straps (excellent for keeping cables in order).
- An anti-static wristband (a great way to protect your tender parts from static electricity).
- Wire shears or snips (could be useful).
Set Up Your Workspace:
Set up your desk. It should be:
- Large, clean, and well-lit.
- Not on carpet (to avoid static electricity problems).
Put down the cardboard box from your motherboard or case to make a safe, non-conductive area to work on.
Beginning the Assembly Adventure: Getting Everything in Order
Here's where the real fun starts!
Motherboard Preparation:
Please ensure your CPU is prepared before placing it in the case.
- Carefully put in the CPU, making sure it lines up exactly with the socket marks (no force needed!).
- Follow the instructions to mount your CPU cooler. Most of the differences between CPU cooler types are related to their installation directions.
- Next, carefully but firmly press each RAM stick into its hole until the clips on both ends click into place.
Installation into the Case:
- Next, carefully put the motherboard into the PC case so that it lines up with the offset screws.
- In the main PCIe spot, put in your graphics card and any other expansion cards you may have.
- Put your SSDs and/or HDDs into the drive bays.
Please take your time, refer to the guides for your motherboard and case frequently, and feel free to verify your connections again.
Starting the Wires and Managing Them
Installing the PSU:
Next, install the Power Supply Unit (PSU). Usually, it's at the top or bottom of the back of the case.
Cable Management:
Now comes a step that many beginners hate, but it's necessary for airflow and looks: managing the cables.
- Connect the smaller CPU power connector and the larger 24-pin main power connection to the motherboard.
- If you need to, connect your case fans, data drives, and power to your graphics card.
Here, you'll use those zip ties or bands to neatly route the wires. Even though most new parts use SATA power connectors, you may come across older fan controllers or accessories that need a different connection. If you do, knowing how a basic Molex cable assembly works can help, though these older parts are becoming less common.
By slowly routing wires behind the motherboard tray, you can keep the main room clean. This enhances airflow and simplifies future upgrades.
Start-up and First Boot: The Big Moment
After connecting and assembling everything, it's time for the nerve-wracking first boot.
Initial Power-On:
- Connect your power cord, computer, and mouse.
- Take a deep breath and then press the start button!
- Hopefully, the BIOS/UEFI screen or the name of the maker should appear. It's wonderful to succeed! (If not, please don't be concerned; see troubleshooting below).
BIOS/UEFI and OS Installation:
- Go to the BIOS/UEFi to check that everything is there by pressing the DEL, F2, or other key displayed on the monitor.
- You'll then boot your operating system from a USB drive that could either be Linux or Windows.
- Once you have the Operating System installed, everything will function properly since you have installed CPU, GPU, and other hardware drivers.
Thanks for Coming to the Club!
Hey, excellent job! After navigating the world of PC parts and connections, you have successfully built a custom computer. It's a big success that not only gives you a strong machine but also useful information about the technology you use every day. Reward yourself for your hard work and dedication. Now, go have fun with your work.
Have you recently built a PC, or are you planning to do so in the near future? Let's learn from each other. Please feel free to share your thoughts or questions in the section below.


