You’re staring at scuffed skirting boards and oven grime, wondering how much of your deposit hangs in the balance. The usual weekend tidy-up won’t cut it, and that realization can feel overwhelming.
By breaking down each task, from carpet stains to bathroom limescale, you’ll see that every hurdle has a method. If you’ve ever googled move-out cleaning checklists, you already know the stakes and the relief of a systematic plan.
Tackling Persistent Bad Odours
Nothing torpedoes viewings faster than mystery smells; conquer them methodically, combining science, persistence, and the right gear before prospective tenants ever step across the threshold.
- Deep extraction first. Steam-clean carpets, soft furnishings, and mattresses to physically remove embedded smoke, pet, or cooking residues rather than simply masking their presence.
- Neutralise airborne particles. Run HEPA air purifiers with activated charcoal filters for forty-eight hours, replacing filters immediately before handing keys back.
- Bake soda overnight. Generously sprinkle carpets and cupboards, letting the powder absorb acids and bases, then vacuum slowly to capture every grain.
- Deploy natural absorbers. Bowls of coffee grounds, white vinegar, or citrus peels quietly trap stubborn molecules, giving the property a fresh, neutral baseline.
- Finish with ozone. When everything else fails, professional ozone treatment oxidises remaining contaminants; schedule equipment pickup at least twenty-four hours before inspection.
For a deeper dive into layered odour strategies, explore Azibo’s landlord guide on eliminating previous tenants’ smells and adapt the seven-step plan to your timeline.
Removing Stubborn Carpet Stains
Wine rings, pet accidents, and mystery blotches instantly downgrade a property; addressing them promptly keeps fibres bright and valuation reports friendly to outgoing tenants.
Identify the Stain Composition
Knowing whether you face tannin, protein, or oil determines which cleaner, temperature, and dwell time provide the safest, most effective removal without colour loss or fibre distortion.
Pre-Treat with Targeted Solutions
Use enzyme digesters for biological spots, oxidising agents for dyes, and solvent-based formulas for grease; always test inconspicuous corners first to avoid permanent shading differences.
Extract and Neutralise Residue
After agitation, rinse thoroughly using a hot-water extraction machine, then apply an acidic rinse to balance pH and prevent crunchy residue or rapid re-soiling later.
Eliminating Kitchen Grease Buildup
Grease hides on cupboard tops, extractor filters, and splashbacks, attracting dust, odours, and potential mold; remove it decisively to impress fussy inventory clerks.
- Start with heat. Warm greasy surfaces using a steam cleaner or hairdryer, loosening polymers so detergents penetrate instead of merely sliding away.
- Use alkaline degreasers. Professional concentrates break ester bonds, lifting sticky films from stainless steel, painted wood, and tiles without punishing scrubbing.
- Scrub smart. Microfibre cloths plus non-scratch pads protect finishes yet reach textured crevices where airborne fats congeal during everyday frying.
- Rinse relentlessly. Residual detergent attracts fresh grime; wipe twice with hot water, then buff dry to restore factory shine and prevent watermark halos.
- Replace disposable parts. Paper cooker hood filters cost pennies compared with grease-fire risks or failed inspections—swap them and note the date on the casing.
Finishing with a food-safe sanitizer removes lingering bacteria and delivers a pleasant, inspection-ready neutral smell throughout the cooking zone.
Combating Mould and Limescale
Bathrooms suffer relentless moisture and mineral deposits; ignoring them invites deposit deductions, health complaints, and negative online reviews from incoming residents.
Target Hidden Moisture Pockets
Check silicone seals, extractor fan housings, and under-sink pipes for condensation; wipe dry, treat with fungicidal spray, and improve airflow using continuous-running vents where possible.
Descale with Purpose
Apply citric-acid gel or eco vinegar wraps to taps and showerheads, allowing twenty minutes’ dwell; stubborn chalk releases without scratching chrome or etching glass doors.
Refresh Grout Lines
Scrub grout using an alkaline cleaner, rinse, dry, then apply a grout-renew pen; bright lines convince inspectors the entire bathroom received professional attention, even under harsh lighting.
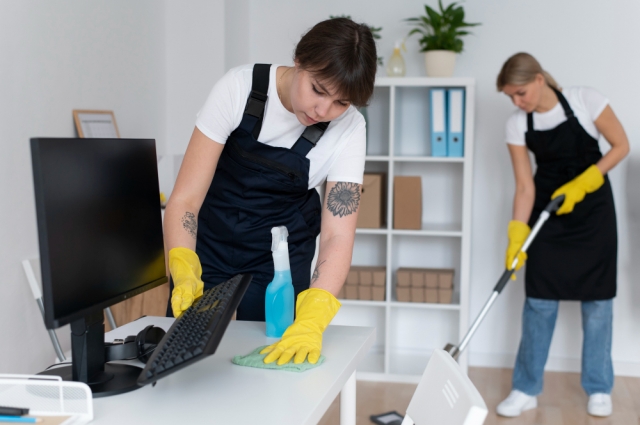
Essential Cleaning Tools List
The right arsenal turns marathon scrubbing into efficient, satisfying sprints, saving energy, time, and replacement costs on damaged surfaces or inadequate results.
- Microfibre cloths. Lint-free fabric traps dust electrostatically, polishes glass, and survives hundreds of laundering cycles without losing absorbency.
- Extendable duster. Reaches ceiling fans, smoke detectors, and wardrobe tops, preventing cobweb embarrassments during height-conscious inspections.
- pH-neutral floor solution. Safely cleans hardwood, laminate, and vinyl, leaving no dulling residue and preserving manufacturer warranties.
- Detail brushes. Nylon and silicone heads tackle window tracks, faucet bases, and appliance knobs where grime congregates unseen.
- Wet-dry vacuum. Extracts wash water after carpet cleaning, speeds drying times, and doubles as a powerful everyday crumb collector.
Reference COIT’s concise checklist of twelve essential supplies to audit your kit and eliminate expensive, redundant gadgets crowding storage cupboards.
Step-by-Step Deep Clean
A structured approach transforms overwhelming chaos into manageable tasks, ensuring nothing important slips through the cracks during fast-paced move-out schedules.
Assess and Prioritise
Conduct a brisk walkthrough, rating rooms by severity, setting realistic time blocks, and rallying helpers so momentum, not procrastination, drives the entire operation forward.
Declutter Before Scrubbing
Removing rubbish and personal items instantly reveals hidden dust, reduces tripping hazards, and accelerates subsequent wiping, mopping, and disinfecting stages exponentially.
Execute Top-Down Cleaning
Work from ceilings to floors, pushing debris downward only once; this logical sequence avoids redundant wiping and preserves energy for detail polishing at the end.
DIY Cleaning Pros & Cons
Choosing between sweat equity and professional help depends on budget, stamina, and the landlord’s tolerance for imperfections discovered during microscopic inspections.
Advantages of Going Solo
Savings on labour, personal control over products, and flexible timing empower determined tenants, especially those already owning reliable equipment and enjoying meticulous tasks.
Hidden Downsides
Exhaustion, overlooked details, and unanticipated material costs can erode savings; missed mildew behind appliances may later trigger partial deposit forfeiture or negative references.
Hybrid Strategy
Outsource specialist tasks—carpet extraction, high-reach window cleaning—while handling simpler dusting yourself; this balanced approach maximises value without sacrificing professional-grade results overall.
When to Hire Professionals
Certain red flags signal it is time to call in the cavalry, trading elbow grease for guaranteed, documented sparkling results that satisfy even perfectionist landlords.
- Time crunch. Overlapping move-out and move-in dates leave mere hours, making personal deep cleaning realistically impossible despite best intentions.
- Specialist requirements. Furnished properties, luxury materials, or pest-control certificates often demand licensed technicians and insurance coverage beyond tenant capability.
- Health considerations. Severe allergies, chemical sensitivities, or mobility issues complicate strenuous scrubbing and product handling obligations.
- High financial stakes. Large deposits or corporate leases justify investing in a no-argument professional guarantee that secures every refundable penny.
Reputable companies issue invoices and satisfaction guarantees, providing landlords documentation and tenants peace of mind long after keys exchange hands.
Final Polish
You now understand the typical tenancy cleaning hurdles and the precise methods to overcome them. Apply disciplined routines, the right tools, and realistic judgement about when professional aid is justified. Address odours, stains, grease, and mould systematically, and you’ll leave any property inspection-ready while protecting your deposit from unnecessary loss.


